Properly functioning brakes are essential for motorcycle safety and control. Over time, air and moisture can enter the brake lines, reducing braking efficiency and responsiveness. Learning how to bleed motorcycle brakes correctly helps restore the hydraulic system’s integrity, ensuring your brakes perform as intended. This article provides a detailed, step-by-step guide covering the tools required, safety considerations, and common pitfalls to avoid during the brake bleeding process.
Why Bleed Motorcycle Brakes?
Brake bleeding removes trapped air bubbles from the hydraulic brake system. Air compresses under pressure, making the brake lever feel spongy and reducing braking force. Additionally, old brake fluid can absorb moisture, which lowers braking performance and increases corrosion risk within brake components. Regular bleeding, typically every 1-2 years or when brake feel deteriorates, maintains optimal brake responsiveness and prolongs component life.
Essential Tools and Materials
Prepare the following before starting:
Brake fluid: Always use the specific type recommended for your motorcycle (usually DOT 3, DOT 4, or DOT 5.1). Never mix different types.
Wrench or spanner: Sized to fit the brake caliper bleed nipple.
Clear plastic tubing: To attach over the bleed nipple and direct expelled fluid into a container.
Catch container: To collect old fluid safely.
Rubber gloves and safety glasses: To protect skin and eyes from brake fluid.
Clean rags or paper towels: For wiping spills.
Assistant: Helpful but not required if you use a vacuum or pressure bleeding tool.
Understanding Your Motorcycle’s Brake System
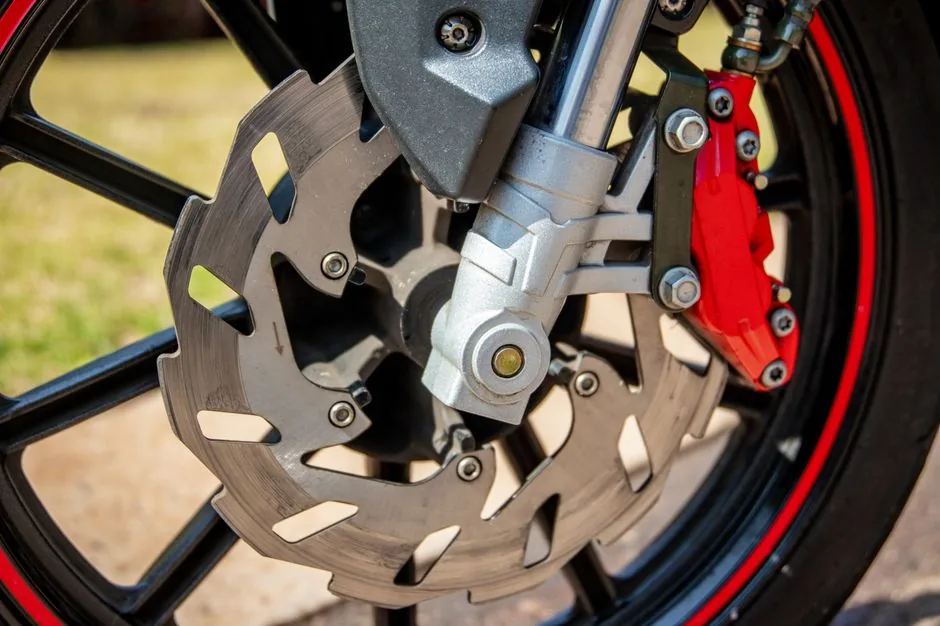
Most motorcycles use hydraulic disc brakes consisting of a master cylinder at the handlebar or pedal and calipers that squeeze brake pads onto rotors. When you press the lever or pedal, brake fluid pressure transmits force to the calipers. Any trapped air in the lines adversely affects this pressure transmission. Before bleeding, consult your motorcycle owner’s manual for specific instructions and fluid type.
Step-by-Step Guide to Bleeding Motorcycle Brakes
Follow these steps carefully to ensure effective and safe brake bleeding:
Prepare the motorcycle: Park on a stable surface, ideally with the front wheel off the ground using a stand. Remove the brake master cylinder reservoir cap and diaphragm, keeping dirt out.
Top off brake fluid: Fill the reservoir with fresh brake fluid to the recommended level. Keep it topped during the entire process to avoid introducing more air.
Attach clear tubing: Slip one end over the caliper’s bleed nipple and submerge the other end in the catch container partially filled with brake fluid to prevent air intake.
Open the bleed nipple: Use the correct wrench to loosen it slightly (do not remove). Have your assistant gently squeeze the brake lever or press the pedal to push fluid and bubbles through the tubing.
Close the nipple while lever is compressed: Important to prevent air from re-entering the system. Then release the brake lever slowly.
Repeat until clear fluid flows: Continue the pump-open-close cycle until you see no air bubbles in the fluid exiting the bleed nipple and the brake lever feels firm.
Check and top off the reservoir fluid level again: Do not let it fall below the minimum level to avoid new air entering the system.
Secure bleed nipple and close reservoir: Tighten the bleed nipple firmly but do not overtighten. Replace the reservoir diaphragm and cap securely.
Test brake operation: Before riding, verify the brake lever or pedal feels solid and responsive. If sponginess remains, repeat the procedure.
Common Mistakes to Avoid When Bleeding Brakes
Using incorrect brake fluid: Mixing brake fluid types can damage seals and reduce brake performance.
Allowing reservoir to run dry: This can introduce more air into the system, prolonging bleeding time.
Not closing the bleed nipple quickly enough: Air can re-enter if the nipple remains open while the lever returns.
Over-tightening bleed nipple: Risk of damaging the nipple threads or stripping.
Ignoring safety precautions: Brake fluid is corrosive; wear gloves and protect painted surfaces.
Alternative Methods for Bleeding Motorcycle Brakes
While the manual pump method is common, other methods include:
Vacuum bleeding: Uses a vacuum pump to draw fluid and air out through the bleed nipple, which can be more efficient and one-person friendly.
Pressure bleeding: Applies pressurized fluid to the reservoir, forcing old fluid and air out via the bleed nipple. Usually requires specialized equipment.
Maintenance and Service Intervals for Brake Bleeding
Motorcycle manufacturers generally recommend bleeding brakes every 1 to 2 years, or sooner if you notice:
Spongy or soft brake lever feel
Decreased braking performance
Brake fluid discoloration or contamination
Brake system repairs or component replacement
Regularly check brake fluid level and condition during routine maintenance to avoid unexpected issues.
Image: Anastasia Shuraeva / Pexels
Safety Tips When Bleeding Motorcycle Brakes
Brake maintenance is critical for rider safety. Keep these precautions in mind:
Always wear protective gloves and eyewear to prevent contact with brake fluid.
Work in a well-ventilated area.
Dispose of used brake fluid responsibly; it is hazardous waste.
Do not drive the motorcycle until brakes feel firm and fully functional.
If unsure or uncomfortable, seek professional help from a qualified mechanic.
FAQ: Frequently Asked Questions About Bleeding Motorcycle Brakes
How long does it take to bleed motorcycle brakes? Typically 15-30 minutes depending on experience and method used.
Can I use automotive brake fluid in my motorcycle? Only if it matches the type recommended by the motorcycle manufacturer (DOT rating must match).
Is bleeding brakes necessary if I only changed brake pads? Yes, air can enter when opening the brake system for any reason.
Why does my brake lever still feel soft after bleeding? Possible incomplete bleeding; air may remain trapped or there may be a system leak.
How often should brake fluid be changed? Usually every 1-2 years to prevent moisture buildup affecting brake performance.
Can I bleed the brakes myself without an assistant? Yes, using a vacuum or pressure bleeding tool makes solo bleeding easier.
Verdict: Is DIY Brake Bleeding Worth It?
Learning how to bleed motorcycle brakes yourself can save money and increase mechanical confidence. When done correctly, it ensures reliable braking and enhances safety. However, it requires attention to detail, proper tools, and strict safety measures. For riders unfamiliar or uncomfortable with brake systems, professional service is advisable to ensure optimal brake function without risking safety.
Maintaining your motorcycle’s brake system regularly is essential for dependable stopping power. This guide offers comprehensive, clear instructions to confidently perform brake bleeding. Remember, if in doubt, seek expert assistance to avoid potentially dangerous situations.