The Harley Davidson Rocker has won over its users’ affections thanks to its potent engines, uncommon look, and rebellious attitude. However, the Rocker users do experience problems, just like any mechanical masterpiece.
So, what are the Harley Davidson Rocker’s problems? The common problems include oil leaking from the rocker box, dull suspension due to worn-out shocks, and spongy brakes. Similarly, electrical issues are also present, such as lights not working and engines not starting.
Whether you are willing to buy the Rocker or already using it, knowing about these problems is a must. Well, don’t worry, as we will cover an in-depth guide on the problems themselves and their solution. So, without any further ado, let’s get started!
Table: Harley Davidson Rocker Problems And Their Solution
To gain insight into the whole topic, let’s first look at a table!
| Problem | Solution |
| Oil Leaks | Replace the gaskets around the rocker box |
| Tighten the bolts that secure the rocker box to the cylinder head | |
| Replace the rocker box | |
| Dull Suspension | Replace the worn-out shocks |
| Lubricate the suspension system | |
| Spongy Brakes | Bleed the brake lines |
| Replace the brake pad | |
| Electrical Issue | Replace the battery |
| Find and replace damaged wires |
Harley Davidson Rocker Problems: Everything You Might Face
Now, let’s learn the Harley Rocker problems in detail. This will help you understand the depth of the common issues if you are thinking of getting a Harley Rocker.
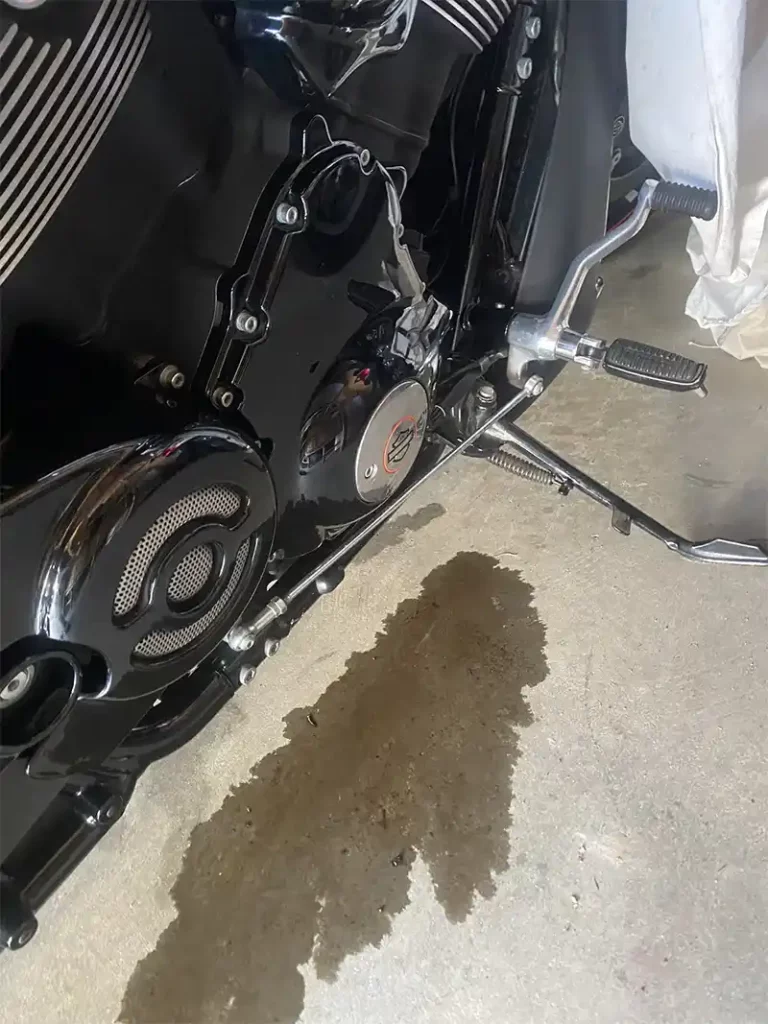
1. Oil Leaks
Oil leaking in a Harley Davidson Rocker is a common issue. Well, there are multiple reasons for oil leaks. One common thing is the rocker box. The rocker box is responsible for maintaining proper lubrication within the valve train system by passing the oil through it.
- Firstly, the gaskets may be worn out or damaged. The rocker box’s sealing gaskets can deteriorate or suffer from damage over time, allowing oil to leak.
This could be brought on by normal wear and tear or incorrect gasket installation during maintenance or repairs.
- Secondly, there is a possibility that the bolts that hold the rocker box to the cylinder head have gotten loose. As a result, an oil leak is seen.
- Lastly, it might be the rocker box itself. Extreme heat or stress may cause cracks or other types of damage to the rocker box. Oil may leak out of the damaged sections as a result of this.
Solution:
To solve the oil leak problem, you need to check things individually to figure out the exact cause. As already mentioned, there could be three reasons behind this problem.
- Start by checking the gaskets around the rocker box and searching for damage. If that’s the problem, then simply take out the old gasket and replace it with a new one, which should cost around $50.
However, ensure that you are using a high-quality gasket designed for Harley Davidson motorcycles.
- Then, check the tightness of the fasteners that secure the rocker box to the cylinder head. If you find any of them to be loose, use a torque wrench to tighten it. However, ensure that you are not over-tightening it, as it can lead to tripped threads, cracked components, or even engine failure.
- Lastly, inspect the rocker box itself for damage. If you find any, there’s no alternative but to replace it.
2. Dull Suspension
The Rocker has earned a spot on Harley’s list of the 12 most comfortable sport bikes because of its reduced seat height and unique Softail suspension. However, the coziness eventually wears off and turns out to be quite a serious problem.
Over time, Harley Davidson Rocker is seen to encounter suspension problems. As a result, excessive bouncing, poor handling, and an uncomfortable ride are what riders go through.
Nevertheless, problems with suspension are frequently caused by worn-out shocks. The internal shock parts may deteriorate over time, resulting in lessened damping capacity, which makes the bike quite uncomfortable to ride.
On the other hand, the moving parts in the suspension system require proper lubrication to operate smoothly and effectively. Thus, insufficient lubrication can lead to suspension problems.
Solution:
For worn-out shocks, you need to replace them. The Rocker uses a special type of shock which is called the Softail suspension system. So it’s a must that you replace it with the same shocks made for the Rocker. Nevertheless, the shocks can cost up to $800 in pairs.
However, if you are willing to replace them with a professional, then the labor cost can sum up to $300.
For the lubrication problem, you have to do the following.
- Get hold of a lubricant made for the bike’s suspension.
- Lift the motorcycle using a suitable stand.
- Loosen and remove the axle nut and slide out the axle to remove the front and rear wheels.
- By removing the triple tree pinch bolts and pulling the front fork tubes out of the corresponding brackets, take off the front fork tubes.
- Remove any parts, such as saddlebags or exhaust pipes, that would prevent you from accessing the rear suspension.
- Now lubricate the suspension and focus more on areas such as bushings, seals, and sliding surfaces.
3. Spongy Brakes:
Spongy brakes are the last thing you want. Unfortunately, some Rocker users did come across this problem, and it is certainly annoying for them. However, it’s not that common.
There are two reasons why you might be facing spongy brakes on your Rocker. First, air might be trapped in the brake line, which is mostly seen due to a leak in the brake lines. Thus, when you press the brakes, the air gets compressed rather than the brake fluid.
On the other hand, worn brake pads also may be a problem. Brake pads wear down and become less effective at generating friction against the rotors after using them for years.
However, stage 3 upgraded Harley bikes don’t usually go through this problem. Yet, the Harley stage 3 upgrade cost is something to keep in mind.
Solution:
If air has been trapped in the brake line, you need to do a heavy task called brake bleeding. The process is as follows.
- Locate the brake bleeder valve, which will be found on each brake caliper. The front caliper is located on the right side of the front wheel, while the rear caliper is positioned on the left side of the rear wheel.
- Turn the bleeder valve counterclockwise with an adjustable wrench to release it. Don’t push it too hard, or it may break or get damaged.
- Take one end of the clear plastic tubing and attach it securely over the bleeder valve.
- Place the other end of the plastic tubing into a clean container that can hold the old brake fluid.
- Ask someone to keep pressure on the brake lever while you perform the bleeding process.
- Slowly turn the bleeder valve counterclockwise to open it, and don’t stop until you see no more air bubbles in the tubing.
- Repeat the process for the other caliper as well.
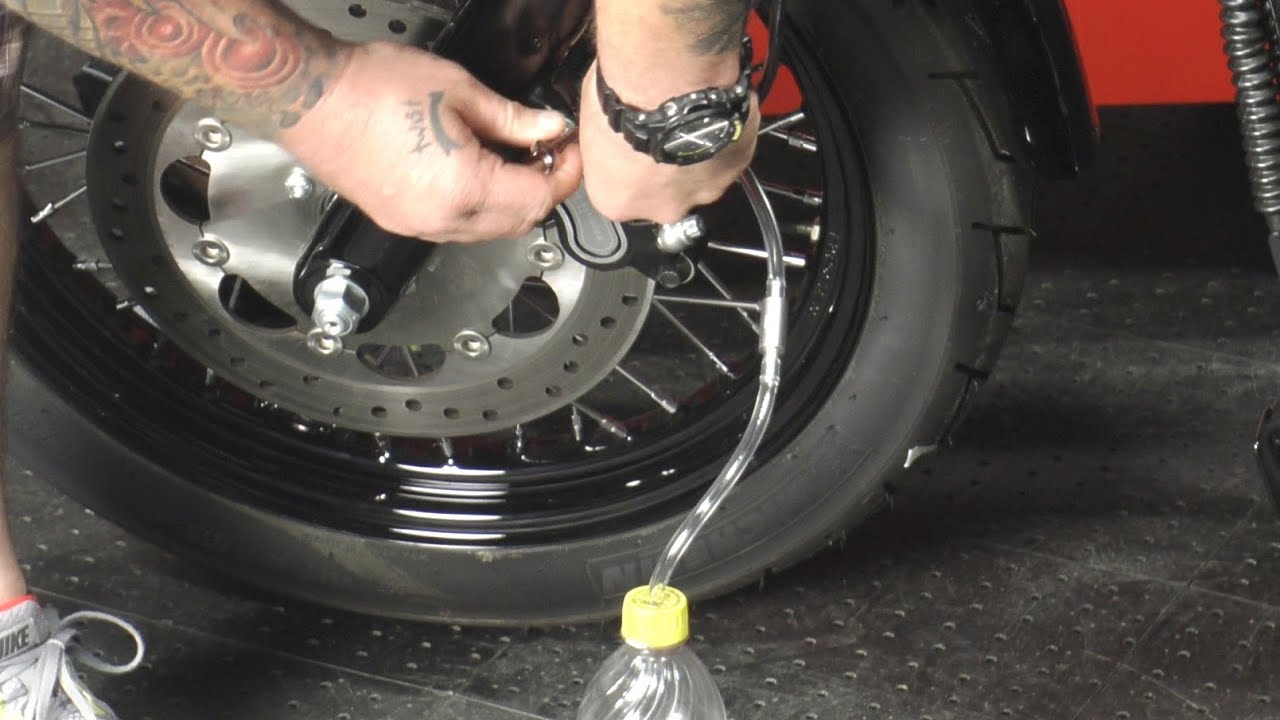
Here’s a video that will help you visualize the bleeding process:
For a worn-out brake pad, it needs to be replaced. The Rocker uses organic brake pads, and the price can range from $60 a pair to $170. However, the labor cost can go up to $300, which you can save by replacing it yourself. Here’s how you can do it:
- Locate the brake caliper, which is typically mounted on top of the rotor and secured by two bolts.
- Use a socket wrench to remove these bolts and carefully detach the caliper from the rotor.
- With the caliper removed, you will see the brake pads. Simply take the old one out, clean the surface, and install the new pad.
4. Electrical Issues
There are multiple problems that Harley Davidson Rocker users go through if electrical issues are present. These problems include the lights not working and engine starting issues. You may need to dig in quite deep to find the root of this problem.
Nevertheless, there are two reasons behind this problem. First, it might be a faulty battery that isn’t supplying enough power to the components.
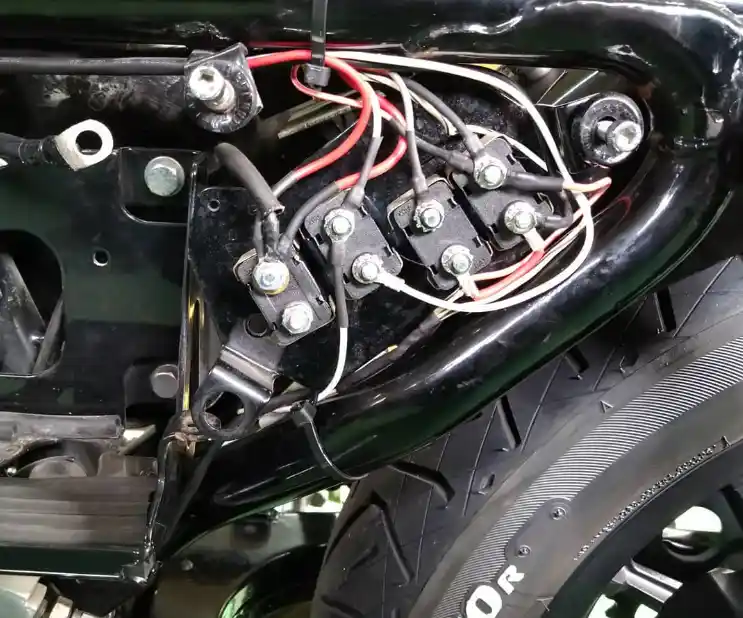
On the other hand, the wiring may have faced vibrations and wear. As a result, damaged or frayed wires are seen, which results in a complete loss of electrical power.
Solution:
For a faulty battery, you need to replace it, which can cost up to $400, including labor. Nevertheless, you can save some bucks by doing it on your own. The replacement process is as follows.
- Turn off the bike.
- Locate the battery underneath the seat by removing the seat by unscrewing the mounting bolts.
- Locate the battery terminals and use a socket wrench to remove the nut securing each cable to its respective terminal.
- Remove the battery.
- Clean the battery connecting ends using a baking soda solution.
- Place the new battery.
- Reconnect the new battery to the connecting ends.
- Install the seat.
For damaged wires, tighten and replace some wires. You will need to go through the following steps. Moreover, high-quality wires themselves can cost up to $400 if bought from an official Harley Davidson dealer.
- Visually inspect for damaged or loose wires.
- Tighten the loose wires to the connector or terminals.
- If you suspect any damaged wires, use a multimeter to check the continuity and voltage.
- Once confirmed, disconnect any connectors or terminals attached to the faulty wiring and take out the faulty wires.
- Find the replacement high-quality wire made for the Harley Davidson Rocker.
- The new wires should be cut to the proper length, and each end should have a little portion of insulation removed.
- Connect the new wires to the respective terminal or connectors.
FAQ
Let’s check out some commonly asked questions regarding the Harley Davidson Rocker problems.
Can I use third-party suspension shocks for Harley Davidson Rocker?
You can use third-party suspension shocks, but it is not recommended. Even though the shocks will be way less expensive, it’s not worth it as you will not receive the same level of comfort.
How much does a new battery cost for a Harley Davidson Rocker?
The price is heavily dependent on various factors such as the type of battery, brand, and location. Nevertheless, the range for a new battery varies between $100 to $300.
How often should brake bleeding be performed on a Harley bike?
The rule of thumb is to bleed the brakes of your bike every 12,000 miles. However, if you are looking for a period, it’s every 2 years that you should perform brake bleeding.
Conclusion
In conclusion, although a user may encounter different Harley Davidson Rocker problems, these four have been the most prevalent. Oil leaks in the rocker box, an uncomfortable suspension system, and a spongy brake are what most Rocker users go through. Similarly, electrical issues lead to the engine not starting and lights not working.
However, all of them can be fixed yourself if you know the ways. Just make sure the gasket surrounding the rocker box is sealed, swap out the shocks, and lube the suspension. Last but not least, bleed the braking system to remove air and replace any damaged wires.